
40% Scale RC Cub Kit Design and Development
Best 40% RC cub Kit J3 PA18 prototype development
40% Cub
This blog is intended to promote and share the progress of our own design which will be supplied as a kit. We are developing this product alongside our other services.
The goal of this kit is to create a large scale model that is of a very high standard in material, design and performance, and very user friendly to construct. I have been building and flying RC models for 30 plus years and have set out to design and build a kit that I would be pleased to build.

My scratch built Ziroli Texan
A key feature is a tab and wedge construction system to aid in the building process, specifically assisting alignment and glue joint glamping. CNC machines and 3D modelling are so precise, that with this building technique the fuselage can be PVA glued and constructed with monocot type alignment. This echoes modern day experimental aircraft which use sheet metal and clecos for alignment. But in this case, the aircraft is constructed with a high quality precision CNC machined polar light weight ply wood wedge and tab system.

Monocot example
This is an example of my full size experimental aircraft build that is of clecoed monocot construction. This was the inspiration for the tab and wedge idea. The wing is assembled and pulled apart for deburring numerus times so you are certain its all going to fit and align properly before final riveting.

Tab and wedge construction close up, after the glue dries the tabs are cut off leaving a straight and well glued fuselage.
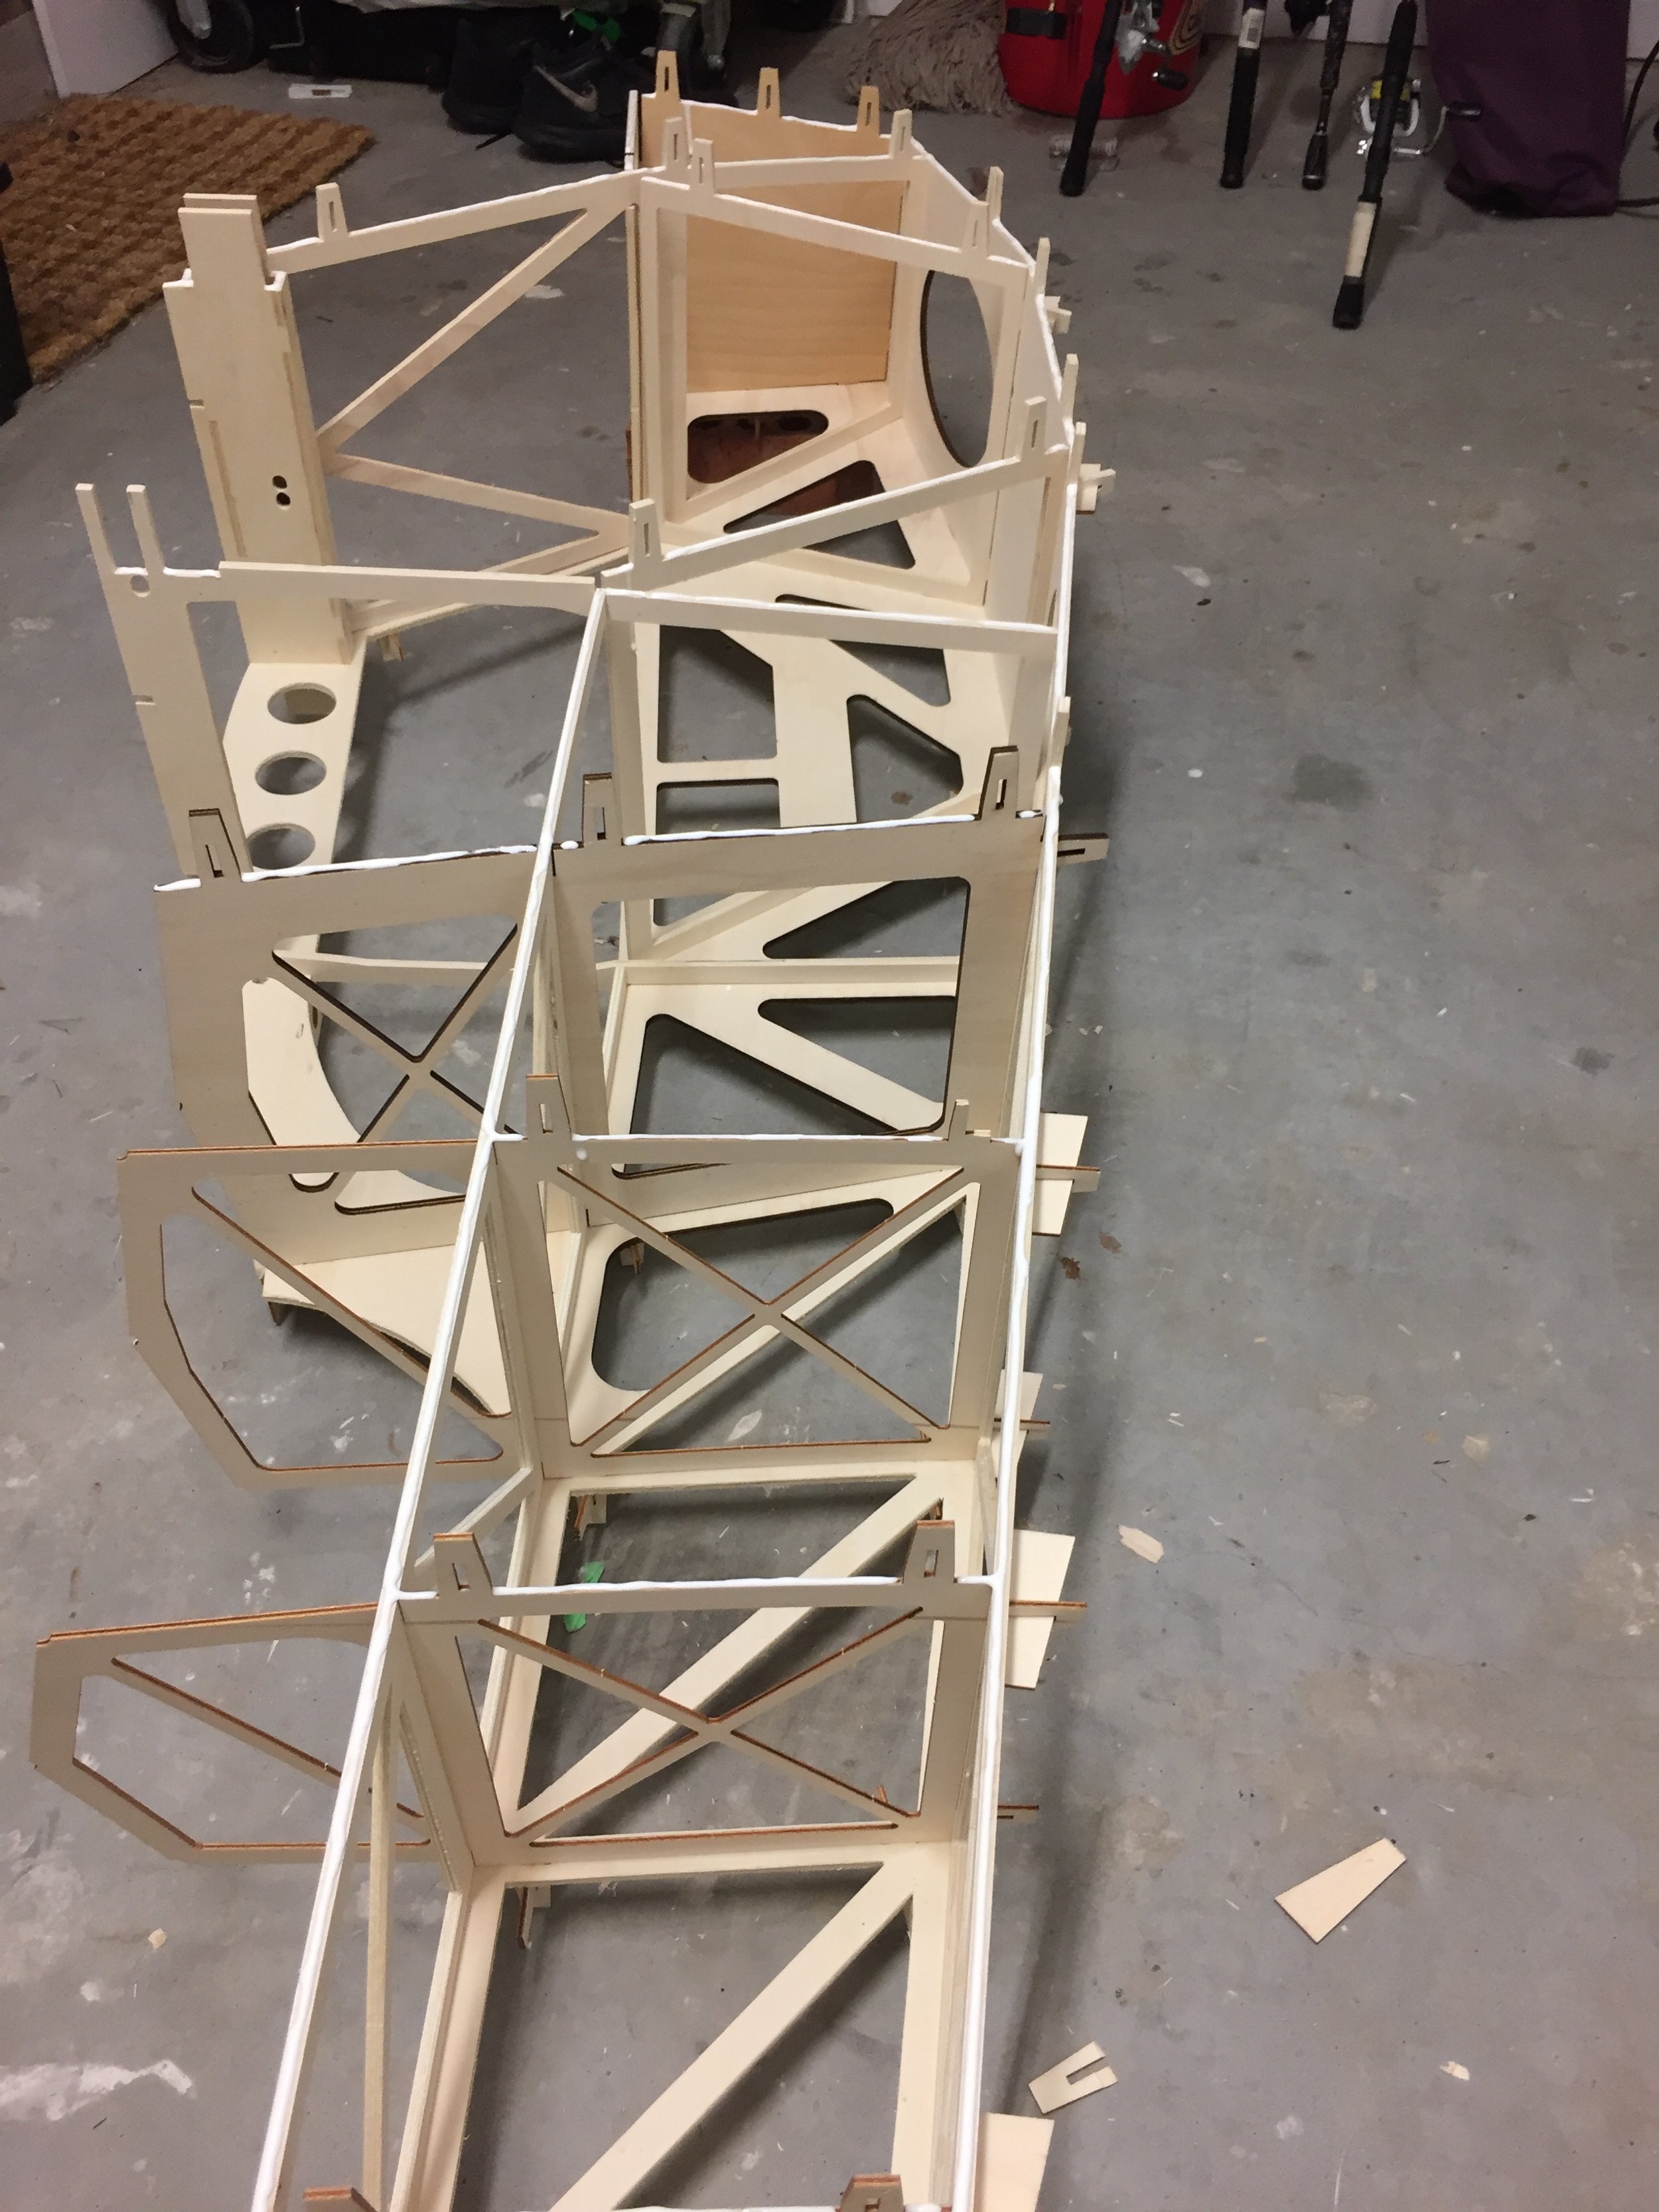
Image showing the fuselage PVA gluing process. The whole fuselage is dry assembled, then one side removed and white glue applied to all mating surfaces as shown. Then the fuselage side is reinstalled with with tab and wedges pulling and aligning the fuselage into position. Allow 1 hour for the PVA glue to dry, then flip and repeat the process on the other side. The main fuselage structure can be assembled and glued in half a day.
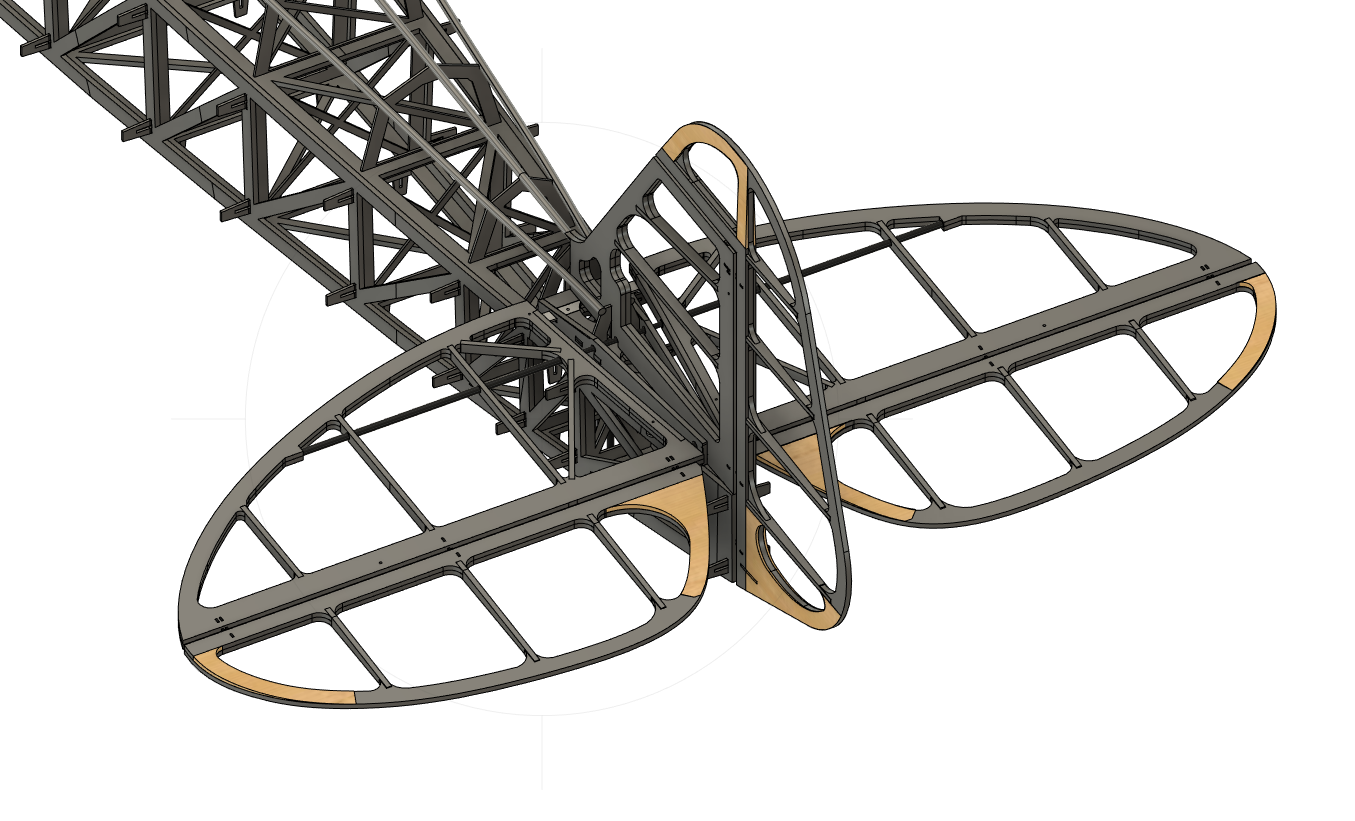
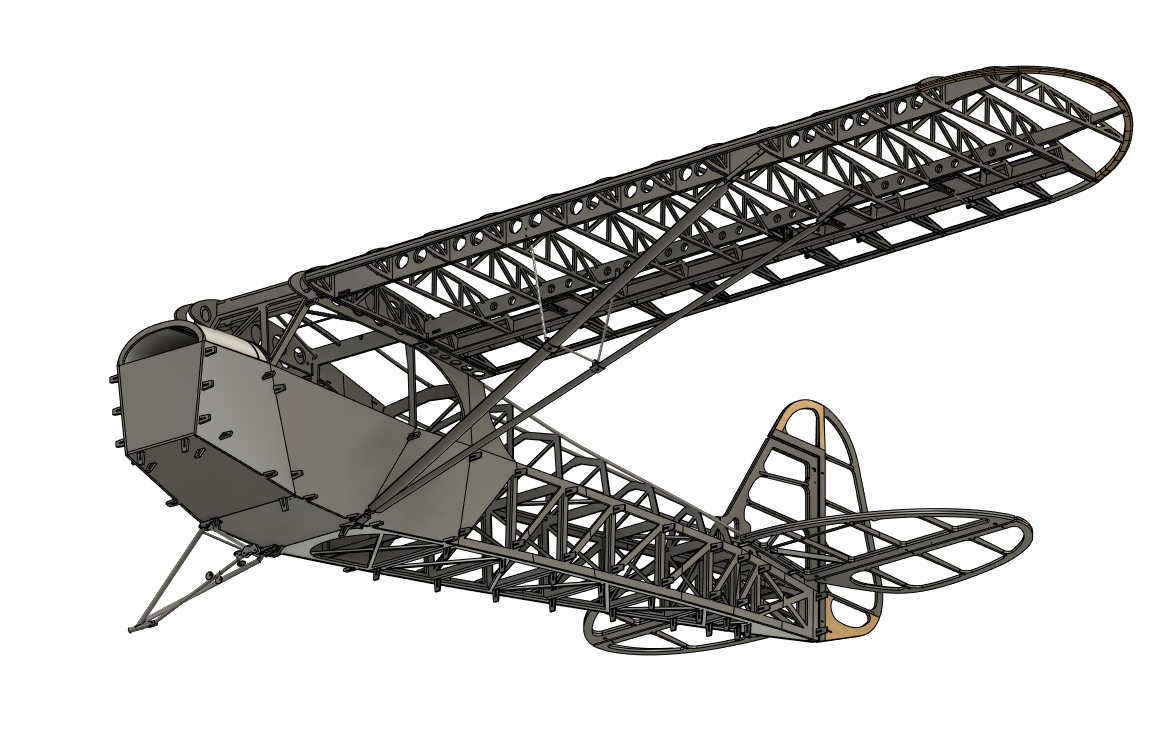
Tail feather design
The tail feathers are two piece, sandwiched, 6mm light ply, with two inner and outer carbon fibre tubes for removal in transport, strength and alignment in construction. Hinges are mechanically fixed and glued between the ply, with no alignment required, again taking advantage of the CNC and 3D modelling precision.

Fuselage glued together and on its wheels with tail feathers on. The under carriage is chromoly 4030 tube, tig welded in jigs with machined attachment brackets.

Attachment brackets match drilled to fuselage bottom.
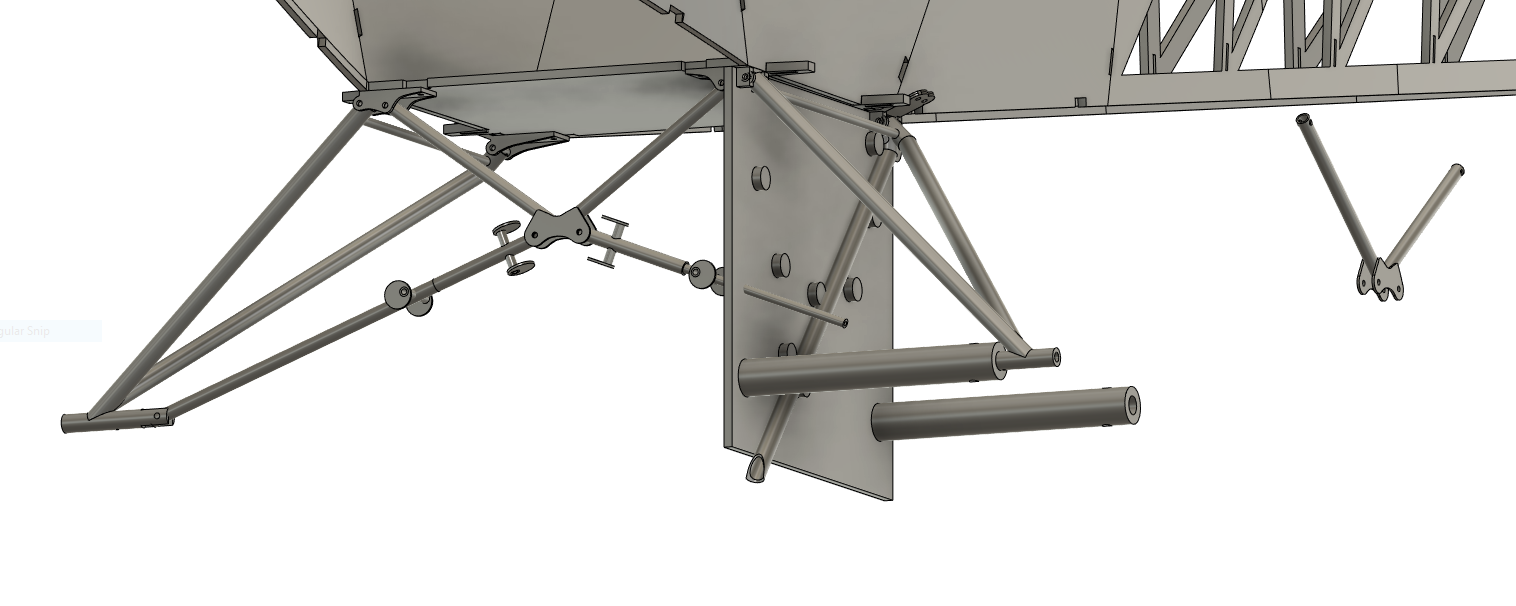
Under carriage welding jig design.

Test fit the suspension. The under carriage and mounting brackets were designed to be robust they are very accurately modelled from the full size aircraft. Tig welded chromoly
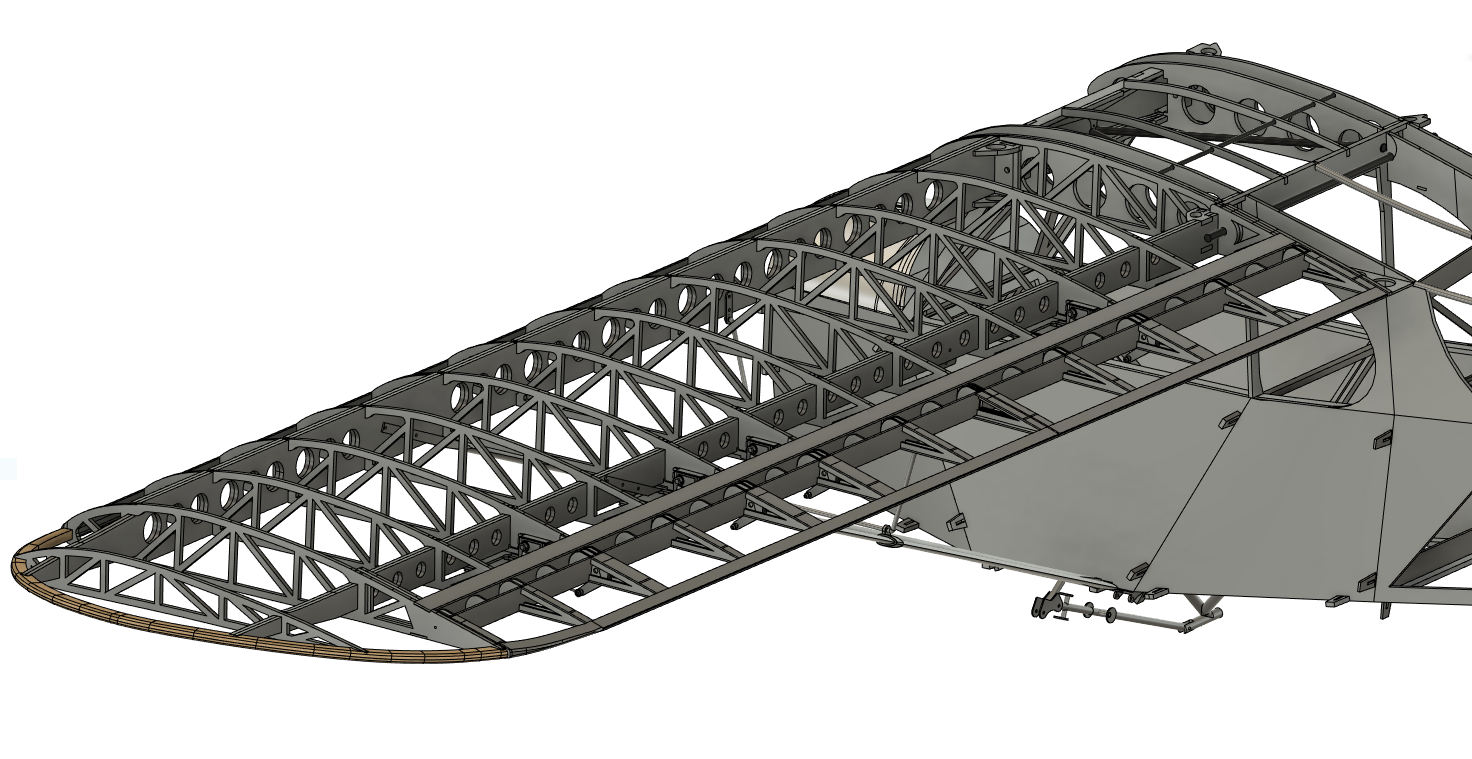
Wing design.


